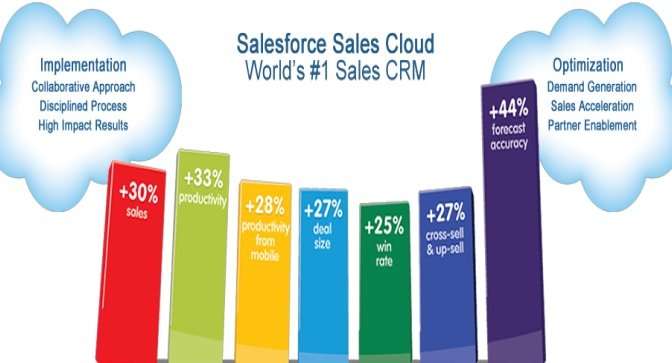
Sales Cloud is one of the cloud services provided by KCloud technologies based on the world’s No.1 CRM platform Salesforce. It helps the Sales and marketing business generate more and more leads in a lesser amount of time and close deals faster than before. Sales Cloud implementation streamlines the business processes, manages all your contacts, follows them, analyses their activity timeline, and helps you increase productivity. It analyses the ongoing projects and gives you the real-time picture for planning future strategies, this way sales cloud implementation by KCloud technologies helps you make a wise decision for the growth of your business.
Simple Guidelines for salesforce sales cloud implementation. The Sales Cloud service offered by KCloud technologies is easily implemented and integrated into the system by following a few steps provided as follows:
1. Add user
- Select New User and enter the details of the user as directed.
- Select Role in Professional, Enterprise, Unlimited, Performance, and Developer Editions.
- Select User license and profile; this determines the access to information for the user.
- Generate the new password and notify the user to check email regarding it.
- Click Save.
Similarly, multiple users can also be added by using the same procedure. You can add 10 users at a time to your organization.
2. Tuning the existing features
- Change tab and filed names by entering Rename tabs and labels by using Quick Find Select Rename Tabs and Labels to change.
- Choose your default language from the Select language drop-down box.
- Click Edit to rename the existing tab and Reset to revert the settings.
- Click
- Updating the picklist choices by navigating in the field area of your interest.
- Click the name of the picklist to update in Custom Field and Relationship
- Click Edit next to the value in the Value section
- Change the value’s name and assign it a color from the chart provided.
- Click Save.
- For logging changes into the data. Click Customize from Setup and select an object.
- Click Fields. Select Set History Tracking and select the option to enable field history tracking.
3. Data Import
- Create an export file and export data from all the data sources.
- Choose Data import Wizard from Quick Find box. Click Launch Wizard.
- To import accounts, contacts, and leads, Choose Standard Objects. To import customized data, choose Custom Objects.
- Specify if you want to add, update records or add and update simultaneously.
- Specify matching and other necessary criteria.
- Specify the file that contains your data and specify your data file by dragging the CSV file to the uploading area of the page.
- Map your data fields to Salesforce data fields.
- Review and Click Start Import.
4. setting up Basic Reporting
- Create and customize the report by selecting New Report. Click
- Click Run Report to Preview after customizing then click Save.
- In the Dashboards tab, click Go to Dashboard List. Click New Dashboard.
- Share a report by clicking on sharing reports on a folder in the reports tab. Select internal users and Click
- Click Done after you’ve shared the reports.
- Rolling out Sales Cloud
5. Rolling out Sales Cloud
For a successful working of the Salesforce Sales Cloud implementation by KCloud, communicate your schedule and activate your user’s account. Set up a time and train your users on this Sales Cloud implementation done by KCloud technologies.
KCloud also provides users with resources such as online study material and training for the implementation and administration of the Sales Cloud. Implementation of Sales Cloud can be successfully rolled out by following the above-provided guidelines. KCloud technologies offer sound services in the Salesforce cloud platform accompanied by its training and implementation in the organization.
For services, contact us at sales@kcloudtechnologies.com

